DIY Cultured Stone A Comprehensive Guide to Creating Beautiful Stone Finishings at Home
Introduction Cultured stone, also known as manufactured stone or artificial stone, is a popular choice for homeowners looking to add a touch of elegance and sophistication to their indoor and outdoor living spaces. This versatile material is made from a mixture of cement, aggregates, and pigments, designed to replicate the look and feel of natural stone. DIY cultured stone projects have gained popularity in recent years as more people seek to enhance their homes with custom stone finishes without the high cost of hiring professional masons. In this comprehensive guide, we will explore the benefits of using cultured stone, the tools and materials needed for DIY projects, step-by-step instructions for creating your own cultured stone finishes, and tips for maintaining and caring for your finished project. Benefits of Cultured Stone 1. Cost-Effective: One of the main advantages of using cultured stone is its affordability compared to natural stone. Cultured stone provides the same aesthetic appeal as natural stone at a fraction of the cost, making it an attractive option for budget-conscious homeowners. 2. Lightweight: Cultured stone is much lighter than natural stone, making it easier to handle and install. This lightweight characteristic also reduces the need for structural support, making it a practical choice for a wide range of applications. 3. Variety of Styles and Colors: Cultured stone comes in a wide variety of styles, shapes, and colors, allowing homeowners to choose the perfect finish to complement their existing décor. Whether you prefer a rustic, weathered look or a sleek, modern finish, there is a cultured stone option to suit your taste. 4. Durability: Cultured stone is known for its durability and resistance to the elements. It can withstand harsh weather conditions, such as extreme heat, cold, and moisture, making it a long-lasting choice for both indoor and outdoor applications. 5. Easy Maintenance: Cultured stone requires minimal maintenance to keep it looking its best. Regular cleaning with soap and water is usually all that is needed to maintain the beauty of your cultured stone finish. Tools and Materials Needed for DIY Cultured Stone Projects Before starting your DIY cultured stone project, it is important to gather all the necessary tools and materials to ensure a smooth and successful installation. Here is a list of tools and materials you will need: Tools: – Trowel: A trowel is used to apply the mortar or adhesive to the back of the cultured stone pieces. – Notched Trowel: A notched trowel is used to create grooves in the mortar or adhesive for better adhesion of the cultured stone pieces. – Grout Float: A grout float is used to press the grout into the gaps between the cultured stone pieces. – Level: A level is essential for ensuring that the cultured stone pieces are installed evenly and straight. – Bucket: A bucket is needed for mixing the mortar or adhesive. – Sponge: A sponge is used for cleaning excess mortar or grout from the surface of the cultured stone pieces. – Safety Gear: Safety glasses, gloves, and a dust mask are essential for protecting yourself during the installation process. Materials: 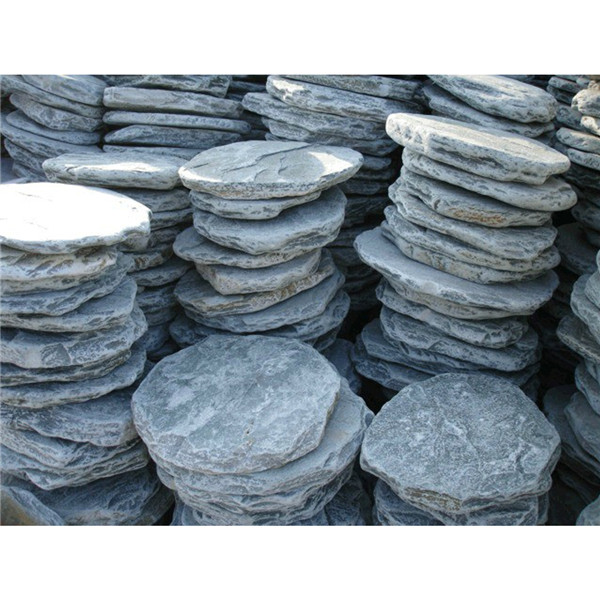 – Cultured Stone Veneer: Choose the cultured stone veneer style and color that best suits your project. – Mortar or Adhesive: Select a high-quality mortar or adhesive that is suitable for cultured stone installation. – Grout: Choose a grout color that complements your cultured stone finish. – Sealer: A sealer is used to protect the cultured stone finish from stains and moisture. – Backer Board: Backer board is necessary for providing a stable surface for the cultured stone installation. – Screws: Screws are used to secure the backer board to the substrate. – Caulk: Caulk is used to seal any gaps or joints in the cultured stone installation. Step-by-Step Instructions for DIY Cultured Stone Installation Now that you have gathered all the necessary tools and materials, it's time to start your DIY cultured stone project. Follow these step-by-step instructions for a successful installation: Step 1: Prepare the Surface – Ensure that the surface where you will be installing the cultured stone is clean, dry, and free of any debris. – If you are installing cultured stone on an indoor wall, apply a moisture barrier to prevent water damage. – Install backer board onto the surface using screws to create a stable base for the cultured stone installation. Step 2: Mix the Mortar or Adhesive – Mix the mortar or adhesive according to the manufacturer's instructions in a bucket until it reaches a smooth, paste-like consistency. Step 3: Apply the Mortar or Adhesive – Using a trowel, apply a layer of mortar or adhesive to the back of the cultured stone veneer piece. – Press the cultured stone piece firmly onto the surface, ensuring it is level and straight. – Repeat this process for each cultured stone piece, leaving a small gap between each piece for grout. Stepping stone shapes for diverse options : Grout the Joints – Once all the cultured stone pieces are installed, use a grout float to press grout into the gaps between the stones. – Wipe off any excess grout with a damp sponge, taking care not to remove grout from the joints. Step 5: Seal the Cultured Stone – Allow the grout to dry completely before applying a sealer to the cultured stone finish. – Follow the manufacturer's instructions for the sealer application process to ensure proper protection and maintenance of your cultured stone project. Tips for Maintaining and Caring for DIY Cultured Stone Finishes To keep your DIY cultured stone finish looking its best for years to come, follow these maintenance and care tips: 1. Regular Cleaning: Clean your cultured stone finish regularly with soap and water to remove dirt, dust, and other debris. 2. Avoid Harsh Chemicals: Avoid using harsh chemicals or abrasive cleaners on your cultured stone finish, as they can damage the surface. 3. Inspect for Damage: Periodically inspect your cultured stone finish for any signs of damage, such as cracks or chips, and repair them promptly to prevent further deterioration. 4. Seal Annually: Reapply a sealer to your cultured stone finish annually to maintain its protective barrier against stains and moisture. 5. Protect from Extreme Temperatures: If your cultured stone finish is installed outdoors, protect it from extreme temperatures and weather conditions to prolong its lifespan. Conclusion DIY cultured stone projects offer homeowners a cost-effective and customizable way to enhance their living spaces with beautiful stone finishes. By following the step-by-step instructions provided in this guide and implementing proper maintenance and care practices, you can create a stunning cultured stone finish that will add style and value to your home for years to come. Whether you are looking to create a cozy fireplace surround, a striking accent wall, or a charming exterior facade, cultured stone is a versatile material that can bring your design vision to life. So roll up your sleeves, gather your tools and materials, and start your DIY cultured stone project today!